Coconut shrimp has a way of making any occasion feel a little more festive. Whether you set them out at a party or just make a batch for yourself on a quiet evening, there is something about that golden crust and sweet, tender shrimp inside that feels genuinely special. And with an air fryer, you can have that restaurant-quality result right in your own kitchen no deep fryer required.
A Dish That Always Disappears First
Coconut shrimp has always had that effect at gatherings. You set the platter down and somehow, within minutes, it is gone. People reach for them without even thinking about it. There is just something about the combination of crispy coconut crust and juicy shrimp that is impossible to walk past.
What makes this recipe feel right for real life is how manageable it actually is. The ingredient list is short, the technique is straightforward, and the air fryer takes care of the hard part. You do not need any special skills or equipment. If you can set up three bowls and press some shrimp into a coating, you are already there.
What Makes These Shrimp So Good
The Flavor Behind the Crunch
The coating on these shrimp is a mix of unsweetened shredded coconut and panko breadcrumbs, and that combination is what makes them work. The coconut brings a mild sweetness and a nutty, toasty flavor once it crisps up. The panko adds structure and that satisfying crunch that holds everything together. The shrimp underneath stay tender and juicy ever rubbery which is exactly what you want.
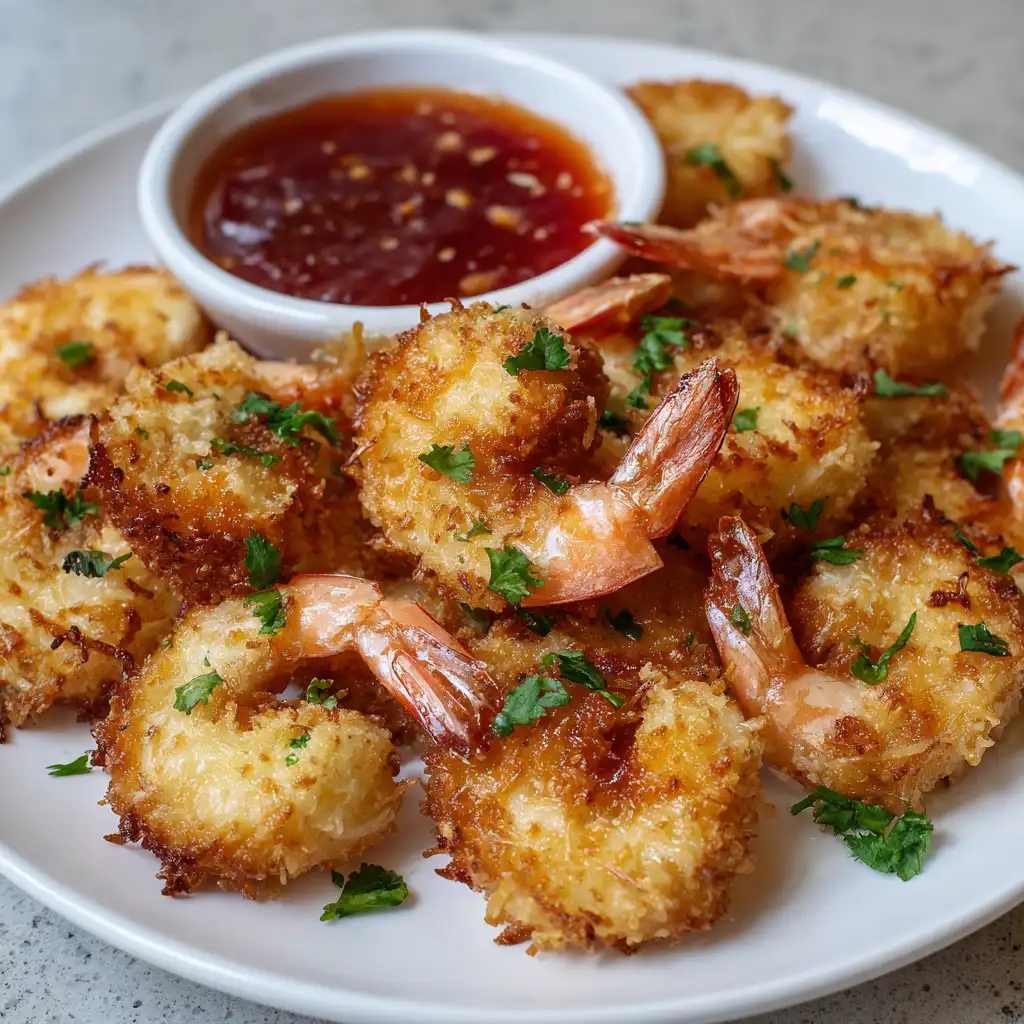
Serving them with Thai sweet chili sauce ties everything together beautifully. The sauce is bright, a little sweet, a little tangy, and cuts right through the richness of the coconut crust. It is a pairing that feels familiar the first time you try it.
Why the Air Fryer Changes Everything
Deep-fried coconut shrimp is delicious, but it also involves a pot of hot oil, a splatter-covered stovetop, and a kitchen that smells like a fry shack for hours. The air fryer skips all of that. A light spray of olive oil is all you need to get that same warm golden color and crisp texture. The hot circulating air wraps around every surface of the shrimp evenly, so you get browning all over not just on one side. It is cleaner, faster, and the results genuinely hold up.
Making Them at Home
Breading and the Butterfly Technique
Start with 1 pound of extra large shrimp that is the 21-26 count size peeled and deveined, with the tails still on. The tails act as a little handle, which makes them much easier to pick up and dip.
Butterflying the shrimp is optional, but it is worth doing if you want that classic restaurant look. Run a small knife along the back of each shrimp, cutting about three-quarters of the way through without going all the way. Then press the shrimp open gently with your hands so it lies flat. It looks a bit more polished on the plate and gives you a bigger surface area to hold all that coconut coating.
Set up three breading trays. In the first, combine 1/4 cup flour, 1/2 teaspoon kosher salt, and 1/4 teaspoon black pepper. In the second, whisk 2 eggs with a tablespoon of water. In the third, mix 3/4 cup unsweetened shredded coconut with 1/2 cup panko breadcrumbs. Before you bread each shrimp, pat it dry with a paper towel this matters more than it sounds. Dry shrimp holds the coating far better than wet shrimp, and it is one of the things that separates a truly crispy result from a soggy one.
Dredge each shrimp in the flour, shake off any excess, dip it in the egg wash, and then press it firmly into the coconut mixture, making sure both sides are well coated.
Cooking and What to Watch For
Preheat your air fryer to 350°F before the shrimp go in. Once it is hot, lay the shrimp in a single layer in the basket do not stack or crowd them. Give them a light spray of olive oil, which helps with browning and prevents sticking. Cook for 4 minutes, then flip each shrimp and cook for another 4 minutes. If you skipped the butterflying step, add another minute or two to that second side.
Every air fryer runs a little differently. The first time you make this recipe, check the shrimp at the 3-minute mark after flipping. You are looking for a warm golden-brown crust and shrimp that feel firm but not stiff. Overcooked shrimp get tough quickly, so pull them out as soon as they look done.
Ways to Make This Recipe Your Own
Substitutions That Work Well
This recipe is naturally flexible. If you need it to be gluten-free, swap the all-purpose flour for a gluten-free alternative like coconut flour, and use gluten-free panko breadcrumbs. The result is nearly identical in texture and flavor.
For the dipping sauce, sweet chili is the classic choice, but you are not limited to it. Mango salsa brings a fresh, fruity brightness that works beautifully with the coconut. A simple apricot preserve dip is another option that tastes surprisingly good. If you want a little heat, a sriracha-honey blend gives the shrimp a spicy-sweet finish that people tend to love.
Adjusting for Your Air Fryer
Basket-style air fryers usually fit one batch of shrimp at a time. If your model has a second rack, you can cook two layers at once just make sure there is enough air circulation between them. Oven-style air fryers often have more surface area and can handle a larger batch. Regardless of the model, the single most important rule is keeping the shrimp in a single layer. Overlapping shrimp steam instead of crisping, and the whole texture changes.

Serving and Enjoying Them
These shrimp are best eaten right after they come out of the air fryer, while the coconut is still crackling and the inside is warm. Arrange them on a platter with a bowl of sweet chili sauce in the center, and they will look like something you ordered at a restaurant.
They work beautifully as an appetizer at a gathering, but they are just as good as a weeknight dinner alongside some steamed rice and a simple vegetable. The tails make them easy to pick up without getting your fingers messy, which is one of the small details that makes them so enjoyable to eat in a group setting.
Storing and Reheating
Store any leftovers in an airtight container in the refrigerator for up to 3 days. The best way to bring them back is in the air fryer a few minutes at 350°F will revive the crunch much better than a microwave ever could. The microwave will warm them up, but it also softens the crust significantly. The air fryer keeps that texture intact.
If you want to make a big batch ahead of time, freeze the breaded shrimp in a single layer on a parchment-lined baking sheet. Once solid, transfer them to a freezer bag and store for up to 3 months. Cook straight from frozen, just adding an extra couple of minutes to the cook time. It is a genuinely convenient way to have something impressive ready to go at short notice.
Frequently Asked Questions
Can I make this recipe gluten-free?
Yes, and it is easier than you might think. Use a gluten-free flour in place of all-purpose coconut flour works particularly well here and swap in gluten-free panko breadcrumbs for the coating. The texture and flavor stay very close to the original, so you really are not giving anything up.
Can I use frozen shrimp?
Absolutely. Most shrimp labeled as “fresh” at the seafood counter have already been frozen and thawed anyway. The key is making sure the shrimp are fully defrosted and thoroughly dried with a paper towel before you start breading. Any residual moisture will keep the coating from sticking properly and will affect how crispy the final result gets.
How long will coconut shrimp keep?
In the refrigerator, stored in an airtight container, they hold up well for about 3 days. In the freezer, you can keep them for up to 3 months. Reheating in the air fryer is strongly recommended over the microwave if you want to preserve any of that original crunch.
How long does it take to cook coconut shrimp in the air fryer?
Generally around 8 minutes total 4 minutes on each side at 350°F. If you did not butterfly the shrimp, plan for a minute or two more. Keep in mind that every air fryer runs differently, so use color and texture as your guide rather than relying entirely on the clock. The shrimp are done when the coconut crust is golden and the flesh feels firm.
A Last Thought
There is a reason coconut shrimp shows up on nearly every restaurant appetizer menu. It is the kind of food that just makes people happy. Knowing you can pull it off at home quickly, with minimal cleanup, and without a single drop of frying oil makes it even better. Once you make this for the first time, you will find yourself coming back to it for both big gatherings and ordinary evenings alike. It is that kind of recipe.
Air Fryer Coconut Shrimp
Ingredients
Equipment
Method
- First, butterfly the shrimp (this step is optional but will give the shrimp a nice appearance). To do this, insert a small knife along the back of the shrimp starting near the head and run it down the center of the shrimp to the tail, cutting about ¾ of the way into the shrimp (do not cut all the way through the shrimp). Using your hands, spread the flesh open until the shrimp lies flat. Repeat with the remaining shrimp.
- Set up a breading station. Place the flour, salt and pepper in a tray and mix them together. Place the eggs in a second tray and whisk them with a tablespoon of water. Place the coconut flakes and breadcrumbs in a third tray and mix them together.
- Working one at a time, pat the shrimp dry and dredge them in the flour. Dust off any excess flour and then dip them into the egg wash. Finally, press the shrimp into the coconut mixture, coating both sides.
- Heat an air fryer to 350°F. When hot, place a layer of shrimp in the basket and spray or brush them with olive oil. Don’t overcrowd the basket. Cook for 4 minutes then open the basket and flip the shrimp over. Cook another 4 minutes until done (if you did not butterfly the shrimp, you may need to cook them 1-2 minutes longer). Remove the shrimp from the basket and cook the remaining shrimp.
- Arrange the shrimp on a serving platter. Serve them with sweet chili sauce or your favorite dipping sauce.
Notes
- Pat your shrimp dry before breading it. This will help the coating stick better and allow the shrimp to get extra crispy.
- Preheat the air fryer first to get it nice and hot before cooking.
- You can spray or brush the air fryer rack with oil as well as the food, if desired. You can skip this step but I like to spray the shrimp to get a nice golden brown color and to prevent sticking.
- Don’t overcrowd the basket. You want the shrimp in a single layer so that the air circulates around them. This will help them cook evenly and crisp up nicely. If your air fryer comes with a second rack, you can put a layer of shrimp on that as well and cook twice as many.
- Flip the shrimp halfway through to get even browning on both sides.
- Every air fryer is different in terms of how hot they get and how quickly they heat up so you may have to adjust the temperature and cooking time based on your air fryer. This recipe was tested using a Ninja Max XL 5.5 quart air fryer.
Serving: 1 shrimp | Calories: 47kcal | Carbohydrates: 3g | Protein: 4g | Fat: 3g | Saturated Fat: 2g | Polyunsaturated Fat: 1g | Monounsaturated Fat: 1g | Trans Fat: 1g | Cholesterol: 37mg | Sodium: 171mg | Potassium: 46mg | Fiber: 1g | Sugar: 1g | Vitamin A: 54IU | Vitamin C: 1mg | Calcium: 16mg | Iron: 1mg