Brussels sprouts have a complicated reputation, and most of it is unfair. Roast them right — with high heat, a little oil, and enough space to breathe — and they become something you eat straight from the bowl before they even make it to the table. The air fryer makes that possible on any given weeknight, with no sheet pan required and no waiting on a slow oven.
The Vegetable That Changed Its Own Story
For years, Brussels sprouts were the thing nobody wanted on their plate. They showed up boiled and soft and vaguely bitter, and then they sat there, getting cold, while everyone politely avoided them. A lot of us carry that memory around without ever giving the sprout a proper second chance.
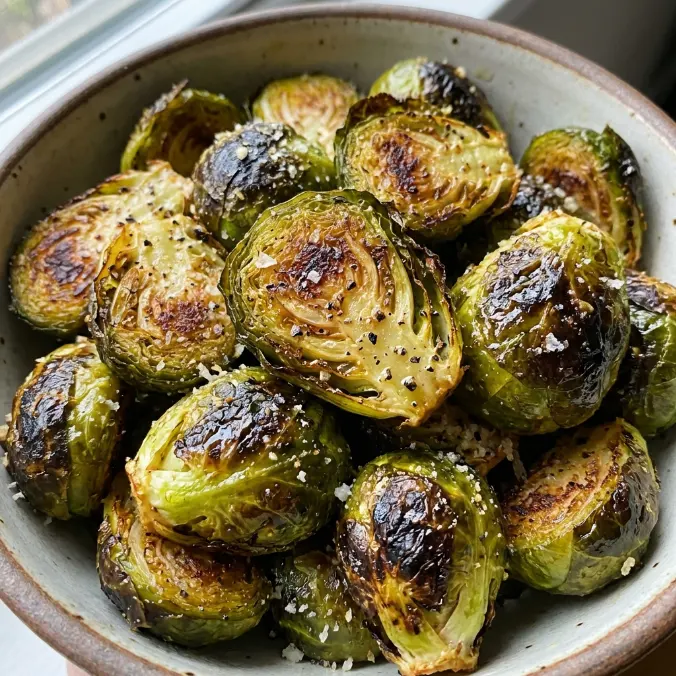
The moment I started roasting them instead, everything shifted. The outside caramelizes, the edges go deep brown and papery-crisp, and the inside turns nutty and tender. They stopped being the vegetable I pushed to the side and became the vegetable I hoped someone had not eaten before I came back for more.
The air fryer does not just match that result — on most nights, it beats it. And it does it in about the time it takes to warm up the oven.
Why This Recipe Fits Real Life
One pound of Brussels sprouts, two teaspoons of olive oil, salt, pepper, and a few slices of garlic if you feel like it. That is essentially the whole shopping list. No elaborate marinade. No special equipment beyond the air fryer you already own.
This is the kind of recipe that earns its place on rotation because it is genuinely low-effort and the results taste like more effort went into it than actually did. On busy weeknights, that is not a small thing. It is the reason dinner happens at all.
What Makes These Ingredients Work Together
The simplicity here is intentional. Brussels sprouts have a natural depth of flavor — a slight bitterness balanced by an almost nutty, sweet core — and the seasoning list is designed to support that rather than cover it up.
Two teaspoons of extra-virgin olive oil is enough to coat the sprouts without making them greasy. It gives the dry heat something to work with, allowing the cut faces of each sprout to brown rather than steam. Kosher salt and black pepper do what they always do best: they draw out flavor that was already there waiting to be found. The sliced garlic, added toward the end of cooking, crisps up in the heat and adds little golden, savory bites scattered throughout the bowl.
The optional toppings — a drizzle of balsamic glaze, a splash of pomegranate molasses, a teaspoon or two of maple syrup, or a shower of freshly grated Parmesan — are each a complete thought on their own. Any one of them takes the sprouts in a slightly different direction without overcomplicating the whole thing.
Why the Air Fryer Does This Better
The challenge with Brussels sprouts in a regular oven is that they need high heat and plenty of dry air to crisp. A crowded pan or an oven that takes forever to preheat can leave you with sprouts that are technically cooked but soft and a little sad.
The air fryer solves both problems. It preheats in minutes and blows hot air continuously around the food, which means the cut sides of the sprouts get the concentrated, even heat they need to go genuinely crispy — not just browned, but that satisfying, papery, shatteringly crisp texture that makes them impossible to stop eating. No sheet pan, no oven monopolization, no forty-five minute wait.
Practical Tips That Actually Help
Start with the air fryer preheated to 375°F. That initial burst of heat when the sprouts go in matters — it is what begins the browning before moisture can escape and steam the sprouts instead.
Cut each sprout in half from stem to end, placing them cut-side down in the basket when possible. That flat face is where the best crisping happens. If any sprouts are noticeably larger than the others, cut those into quarters so everything finishes cooking at roughly the same time.
There is also an optional soaking step worth knowing about: placing the halved sprouts in warm water for about ten minutes before cooking allows the centers to tenderize slightly before the outsides crisp up. If you like your sprouts with a firmer, more toothsome center, skip the soak entirely. If you prefer them a little softer all the way through, the ten-minute soak does make a real difference. Either way, pat them dry thoroughly before they go into the basket — wet sprouts steam, and steaming is the enemy of crisp.
Cook them for five minutes, shake the basket, cook another five minutes, shake again. At that point, add the sliced garlic if you are using it, then cook for another two to four minutes, checking often, until the sprouts are deeply golden at the edges and smell like something wonderful is happening.
The Mistakes Worth Avoiding
The most common one is crowding the basket. When the sprouts are piled on top of each other, the hot air cannot circulate around them properly, and you end up with a steamed, soft result instead of a crispy one. If your air fryer is small, cook in two batches rather than squeezing everything in at once.
The second one is adding the garlic too early. Sliced garlic crisps quickly and can go from golden and fragrant to burnt and sharp in just a couple of minutes. Holding it until the last two to four minutes of cooking keeps it in that perfect golden, savory zone.
And do not walk away during those final minutes. The difference between deeply caramelized and overdone can be less than sixty seconds once the sprouts are close to done.
Making It Your Own
The recipe is genuinely flexible. The balsamic glaze version is perhaps the most crowd-pleasing — sweet, tangy, and glossy over the crispy sprouts. A two-teaspoon drizzle of maple syrup at the end gives a similar sweetness but with a softer, more caramel-like character.
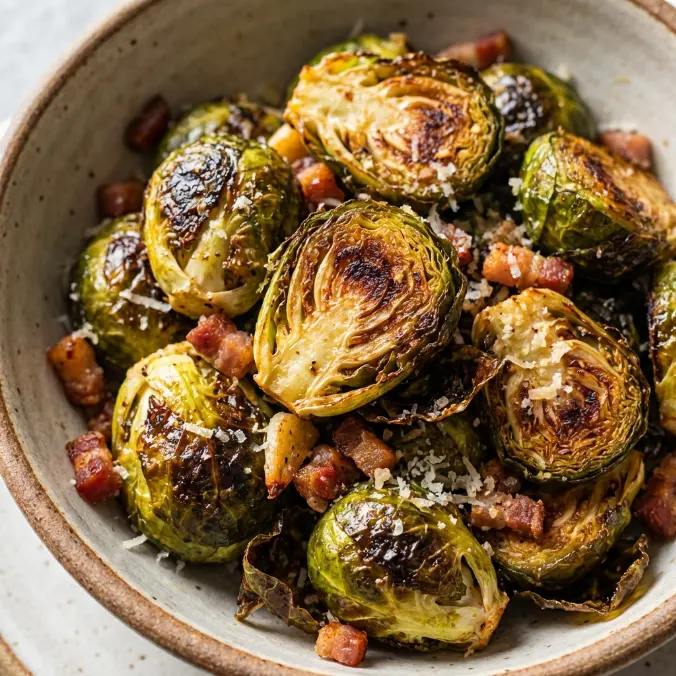
Three tablespoons of freshly grated Parmesan stirred in while the sprouts are still hot melts slightly against the hot surfaces and creates a salty, nutty coating that is hard to resist. Pomegranate molasses, if you have it, adds a tart fruitiness that cuts beautifully through the richness of the roasted sprouts.
If you want to add something more substantial, crumbled cooked bacon in the last few minutes alongside the garlic is a classic combination that needs no explanation.
How Different Air Fryers Handle This Recipe
Most basket-style air fryers do well at 375°F for this recipe. If you have a smaller model, work in batches without guilt — two well-cooked batches are far better than one overcrowded batch that disappoints.
Oven-style air fryers may need a slightly longer cook time, since the heat is distributed across a larger space. Add a minute or two and rely on your eyes rather than the timer. The sprouts should look genuinely caramelized at the edges, not just lightly golden.
If your model runs on the hotter side and the sprouts are browning too quickly before the centers have had a chance to soften, the soaking step will help significantly. It is a small adjustment that gives the insides a head start before the outside crisping kicks in.
When to Serve These
These Brussels sprouts make a natural weeknight side for almost anything — roasted chicken, pork tenderloin, a simple grain bowl, or a hearty pasta. They are also the kind of dish that earns a permanent spot on holiday tables because they look and taste like you worked harder than you did.
They are best served immediately, hot from the air fryer, when the edges are at their crispiest. Set out your chosen topping — balsamic glaze, Parmesan, maple syrup — and let people add what they want directly to their serving.
Storing and Reheating
Keep any leftovers in an airtight container in the refrigerator for up to four days. Reheat them on a baking sheet in the oven at 350°F rather than in the microwave, which will leave them soft and limp. The oven brings back at least some of the texture, especially for the outer leaves.
Freezing is not really recommended here. The sprouts turn mushy once thawed, and that texture loss is hard to recover from even with a second round of heat. If you genuinely have a large surplus and need to freeze them, an airtight freezer-safe container works for up to three months — let them thaw overnight in the refrigerator and reheat in the oven — but fresh or refrigerated is always the better path.
Frequently Asked Questions
Do I have to soak the Brussels sprouts before air frying?
Not at all — the soak is optional and entirely based on texture preference. If you like your Brussels sprouts with a firm, toothsome bite all the way through, skip it. If you prefer a softer center with crispy outer leaves, place the halved sprouts in warm water for ten minutes before cooking, then drain and pat them dry well before seasoning. Either approach works, and the final result is delicious both ways.
Why are my Brussels sprouts not getting crispy in the air fryer?
The most likely culprit is moisture. If the sprouts went into the basket while still damp — whether from rinsing or the optional soak — they will steam before they have a chance to crisp. Patting them dry thoroughly is one of the most important steps. Crowding the basket is the other common reason. Too many sprouts packed together blocks airflow, and without proper circulation, the heat turns wet and they cook instead of roast. Give them space, and they will reward you.
When should I add the garlic?
The garlic goes in during the final two to four minutes of cooking, after the sprouts have already had their first ten minutes in the basket. Adding it too early risks burning, since sliced garlic is thin and crisps much faster than the sprouts themselves. Waiting until near the end means it turns beautifully golden and fragrant without crossing over into bitter and charred.
Can I use frozen Brussels sprouts instead of fresh?
Yes, with a few adjustments. Frozen sprouts do not need to be thawed before going into the air fryer, but they will release more moisture than fresh ones as they cook. Leave plenty of space between them in the basket, and add a few extra minutes to the cook time. The texture will not be quite as crispy as fresh sprouts, but they come out surprisingly well for a quick weeknight option when fresh sprouts are not on hand.
A Last Thought
Brussels sprouts have spent decades being misunderstood, and the air fryer might genuinely be the thing that finally settles the argument in their favor. There is something a little wonderful about that — a vegetable so many people wrote off as a childhood punishment turning out to be exactly what dinner was missing. Make them once, finish them straight from the bowl before you even sit down, and see if you do not quietly agree.
Air Fryer Brussels Sprouts
Ingredients
Method
- Trim off the ends of the Brussel sprouts and remove any brown outer leaves. Cut them in half from stem to end. If any are very large, cut them into quarters from stem to end so that all the pieces are fairly similar in size and cook evenly.
- OPTIONAL—This step makes sure the Brussels sprouts a little more tender in the middle; that said, if you don’t mind a firmer sprout, you can skip it—I like my Brussels sprouts firm/tender inside and crispy outside, so I typically skip it—Place the Brussels sprouts in a large bowl and cover with warm tap water. Let sit 10 minutes.
- Preheat the air fryer to 375 degrees, according to the manufacturer’s instructions (for my air fryer, that’s 3 minutes of preheating).
- Drain the Brussels sprouts and with a towel, lightly pat dry. Wipe out the bowl you used for soaking, then add the Brussels sprouts back to it (if you didn’t soak the sprouts, simply place them in a large mixing bowl). Drizzle with the oil and sprinkle with the salt and black pepper. Toss to coat evenly, then add them to your fryer basket.
- Cook the sprouts for 5 minutes, then slide out the basket and shake it to toss the Brussels sprouts to promote even cooking. Cook 5 additional minutes, then slide out the basket again. The Brussels sprouts should look like they are getting nice and crispy and are almost done (if not, let them cook a minute or so longer). Add the garlic cloves and toss to coat once more. Cook 2 to 4 additional minutes, checking and shaking the basket often, until the Brussels sprouts are deeply crisp.
- If adding toppings, transfer the Brussels sprouts to a serving bowl (or wipe out the mixing bowl you previously used) and stir in any desired toppings. Enjoy hot.
Notes
Serving: 1(of 4)
Calories: 67kcal
Carbohydrates: 10g
Protein: 4g
Fat: 2g
Saturated Fat: 1g
Potassium: 443mg
Fiber: 4g
Sugar: 2g
Vitamin A: 856IU
Vitamin C: 96mg
Calcium: 48mg
Iron: 2mg