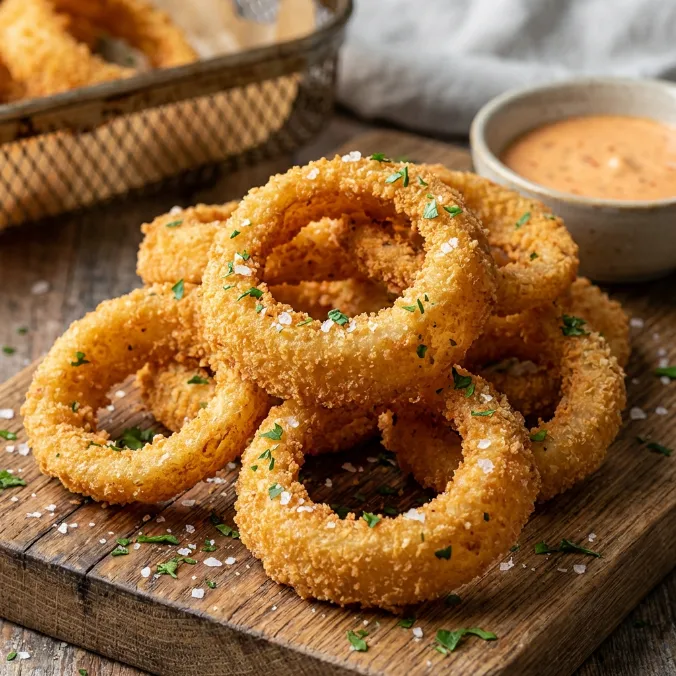
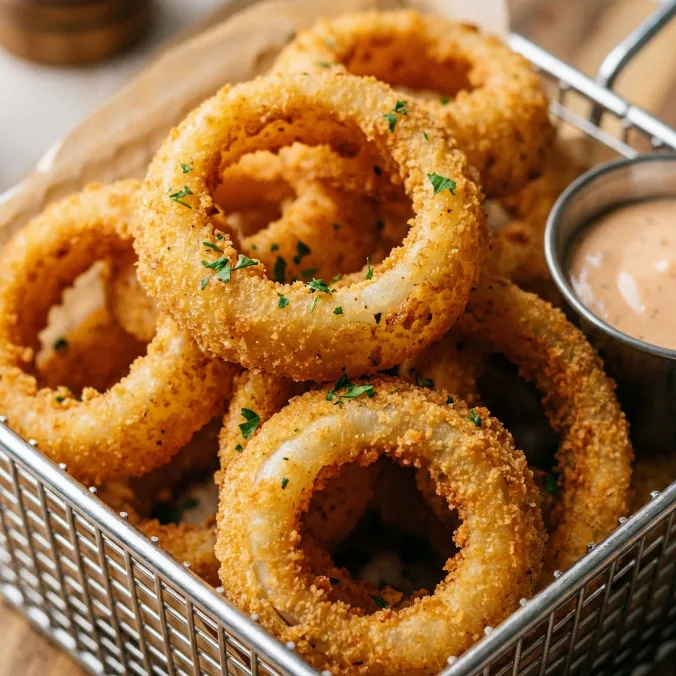
Few things feel as indulgent as biting through a perfectly crispy onion ring — that satisfying crunch giving way to a soft, sweet onion underneath. Making them at home in the air fryer means you get that same result without the deep fryer, the oil splatter, or the lingering smell that settles into every room of the house.
A Classic Worth Bringing Home
Onion rings have always had a restaurant-only reputation in a lot of households. The assumption is that you need a vat of hot oil and a commercial fryer to get anything worth eating. For a long time, I believed that too. The frozen bag from the grocery store always let me down — pale, soggy in the middle, never quite hot enough by the time they were baked through.
The first time I made these in the air fryer, the sound alone was enough to know something different was happening. That audible crunch when you pick one up. The panko coating gone deeply golden. The onion inside gone tender and sweet rather than sharp. It tasted like something from a diner, and it happened in my kitchen on a Wednesday.
Why This Recipe Fits the Life You Actually Have
This is admittedly not a five-minute recipe. There are a few bowls involved, a breading station, a little bit of patience. But the process is straightforward once you read through it, and the payoff is the kind of snack that makes people stop mid-conversation to ask what you made.
One large sweet onion, a handful of pantry staples, and an air fryer is genuinely all you need. No thermometer watching oil temperature. No burning yourself on splatter. No disposing of a half gallon of used cooking oil afterward. Just a little setup, a little dredging, and about twelve minutes in the basket.
What Makes This Recipe Work
The ingredient list is short but every piece of it earns its place. Half a cup of all-purpose flour forms the first dry coat, helping the wet batter have something to grip. The buttermilk and egg mixture that follows creates a slightly thick, tangy batter that adheres beautifully to the surface of each ring. A quarter cup of the flour mixture gets stirred directly into that buttermilk mixture, which thickens it just enough to carry the breading all the way through the cook time without sliding off.
Then comes the panko. A full cup of panko breadcrumbs mixed with two tablespoons of olive oil and half a teaspoon of salt creates the outer coat that becomes crispy in the air fryer. Regular breadcrumbs will work in a pinch, but panko is worth seeking out — it has a coarser, lighter texture that crisps more aggressively under dry heat, and that extra crunch is a big part of what makes these rings so satisfying.
The paprika in the flour mixture adds a warm, subtly smoky backdrop to the whole thing. It does not announce itself loudly, but you would notice its absence.
The Onion Choice Matters More Than You Think
A large yellow sweet onion, sliced half an inch thick and separated into rings. That half-inch measurement is not casual — too thin and the onion becomes soft and wispy inside the breading, too thick and the center stays sharp and undercooked while the outside crisps. Half an inch lands in the sweet spot.
The sweet onion part matters even more. White or standard yellow onions have a sharper, more pungent flavor that does not mellow quite as gracefully in this cook time. Sweet onions — the kind sold under names like Vidalia or Texas Sweet — have a naturally mild, almost caramelized flavor that turns genuinely lovely once they are coated and air fried. Using a sharper onion variety tends to produce a result where the onion flavor overwhelms the rest.
The Breading Process, Step by Step
Set up four shallow bowls before you start. The first holds the flour, paprika, and half a teaspoon of salt. The second holds the buttermilk, egg, and a quarter cup of that flour mixture stirred together. The third holds the panko mixed with olive oil and the remaining half teaspoon of salt. The fourth bowl holds half of the panko from the third bowl — this is your backup, for when the first batch of panko gets sticky and clumpy from contact with the wet batter.
Pat the onion rings dry with paper towels before you begin. Any surface moisture will interfere with how the flour coat grabs onto the onion, and a loose first coat means the whole breading system is less stable.
Use a fork throughout. Your hands will quickly become coated in batter, and once that happens, the whole process gets messy in the wrong direction. A fork lets you transfer each ring from bowl to bowl cleanly, keeping the coatings where they belong.
The order is flour first, then buttermilk batter, then panko. Press gently into the panko to make sure it makes full contact with the batter rather than just resting on the surface.
A Freezer Trick Worth Knowing
After breading the rings, placing them on a baking sheet and sliding them into the freezer for about fifteen minutes before air frying makes a genuine difference. The cold temperature firms up the coating, helps it bond more securely to the surface of the onion, and reduces the chance of the panko separating or falling away during cooking.
It is an optional step, but on days when the kitchen feels warm or the batter seems a little loose, the freeze makes the whole thing more reliable. Think of it as a fifteen-minute insurance policy on your work.
In the Air Fryer: What to Watch
Spray the basket lightly with oil spray before loading the rings. Place them in a single layer — smaller rings can sit inside larger ones as long as there is open space between them and they are not touching directly. Contact between rings during cooking means those edges will stay pale and soft instead of crisping properly.
Cook at 400°F for the full run, stopping around the six-minute mark to give the rings a light spray of cooking oil. That midpoint spray is what pushes the outer coating from lightly golden to deeply caramelized and crispy. Then let them finish out.
Here is the most important rule of this whole recipe: do not shake the basket. With Brussels sprouts or potato wedges, shaking redistributes things helpfully. With breaded onion rings, it dislodges the coating before it has set. Leave the basket alone and let the hot air do its job. The rings will crisp on both sides without any help from you.
Total cook time runs between eleven and fifteen minutes depending on your model. Start checking at the eleven-minute mark and pull them when they are deeply golden and audibly crisp when you tap one.
Lifting Them Out Without Losing the Coating
When the rings are done, resist the impulse to tip the basket or shake things out. Use a cookie spatula or a fork to gently lift each ring individually. The breading is crispy but somewhat delicate right out of the fryer, and anything that involves banging or tossing will cost you some of that beautiful coating on the basket floor.
A little care here takes ten seconds and preserves the work you put in during the breading station.
How Different Air Fryers Handle This Recipe
Every air fryer model runs a little differently, and onion rings are particularly sensitive to that variation because the breading can go from golden to overdone quickly. If your model is known to run hot, start checking at ten minutes. If it is a larger oven-style air fryer, the rings may need the full fifteen minutes to develop the same depth of color.
If your basket is small, cook in two batches rather than overlapping rings. A second batch that is genuinely crispy is a much better outcome than one crowded batch where half the rings steam against each other and the coating slides off.
Making Your Own Buttermilk
If buttermilk is not something you keep on hand — and most people do not — making it takes about thirty seconds. Add one tablespoon of white vinegar or fresh lemon juice to half a cup of regular milk, stir once, and let it sit for five minutes. The acid curdles the milk slightly, thickening it and giving it the tangy quality that buttermilk contributes to the batter. It works just as well as the real thing in this recipe.
Variations Worth Trying
The paprika base is classic and mild. If you want more personality in the coating, garlic powder adds a savory depth that works particularly well. Cayenne pepper — even just a small pinch — brings a slow, gentle heat that plays nicely against the sweetness of the onion. A little smoked paprika in place of regular paprika deepens the flavor profile in a way that tastes like something you would order at a bar.
All of these additions go into the flour mixture, not the panko. The panko is there for texture, and the dry seasonings mixed into the flour are what flavor the rings from the inside out.
Serving and Dipping
These rings are best served immediately, straight from the basket while the crunch is at its peak. A dipping sauce is not strictly necessary but is extremely welcome. Classic ranch, smoky barbecue sauce, a simple sriracha mayo, or even just ketchup — all of them work. If you want something a little more elevated, a quick mix of mayonnaise, a teaspoon of smoked paprika, and a squeeze of lemon makes a sauce that feels purpose-built for these rings.
They suit any table where people are already gathered around — game day, a casual dinner where someone is grilling burgers, a weekend afternoon that just needed something to snack on.
Storing Leftovers Honestly
Onion rings are at their very best the moment they come out of the basket. They will hold their crispiness reasonably well for about twenty minutes at room temperature, but they do soften over time as the steam from the hot onion works its way outward through the breading.
If you have leftovers, refrigerate them in an airtight container and reheat them in the air fryer at 375°F for a few minutes rather than the microwave. They will come back to something close to their original texture — not identical, but genuinely good. The microwave will leave them limp and disappointing, so avoid it if you can.
Frequently Asked Questions
Why do I need four separate bowls for this recipe?
Each bowl serves a distinct purpose in building a coating that actually stays on the onion through the cooking process. The flour creates a dry base for the wet batter to grip. The buttermilk and egg mixture provides the tacky layer that carries the panko. The panko — divided across two bowls — gives you a clean second half to switch to once the first batch gets sticky and clumpy from repeated contact with the wet batter. Skipping any station tends to result in uneven coating that falls off in the basket.
Can I use regular breadcrumbs instead of panko?
You can, and the rings will still taste good. Panko is worth the small effort to find, though, because its coarser, lighter structure crisps differently than fine breadcrumbs. Regular breadcrumbs tend to pack together and create a denser coating that is less audibly crunchy. Panko stays open and airy, which is what gives these rings that satisfying shattering crunch on the outside.
Why should I not shake the basket while the onion rings cook?
The breading on onion rings is more fragile than it looks once the rings are in the basket. Unlike roasted vegetables where shaking helps everything cook evenly, shaking a basket of breaded rings dislodges the coating before it has fully set and adhered. The panko can end up on the basket floor instead of on the ring, leaving patches of bare batter that cook unevenly. Leave the basket untouched and the rings will crisp evenly on their own — the circulating air handles both sides without any help from you.
What is the best way to get the breading to stick?
Three things make the biggest difference. First, pat the onion rings completely dry before you start — surface moisture prevents the flour from adhering properly. Second, use a fork throughout the breading process rather than your hands, which quickly become coated and messy in a way that transfers to the coating. Third, the optional freezer step after breading — fifteen minutes on a baking sheet in the freezer — firms the whole coating and helps it bond much more securely before it hits the heat of the air fryer.
A Last Thought
There is something genuinely satisfying about making onion rings at home and having them turn out better than you expected. The breading station can feel a little involved the first time through, but once you have done it once you realize the rhythm is actually quite simple. Set up your bowls, work in order, do not shake the basket, and the air fryer handles the rest.
Pull them out when they are golden and let someone else in the house try one before they make it to a plate. That reaction — the surprise, the crunch, the slight disbelief that these came from a countertop appliance — is the whole point.
Air Fryer Onion Rings
Ingredients
Method
- You need 4 shallow bowls or deep plates. In the first one combine flour, paprika, and ½ tsp salt. In the second combine buttermilk (or milk and vinegar/lemon juice) and egg, then add ¼ cup of the flour mixture from the first bowl. In the third combine panko breadcrumbs, ½ tsp salt and olive oil with a fork, until the oil is evenly distributed. Put half of the panko in a fourth bowl so you can switch to the second part after the first got sticky.
- Pat dry the onion rings with paper towels to remove excessive moisture. Using a fork, dredge the onion rings in the flour mixture, drop them in the buttermilk mixture and then dredge them in the panko mixture. (TIP: Freeze the breaded onion rings for 15 minutes on a baking sheet, this helps the panko mixture to stick better.)
- Spray Air Fryer Basket with oil spray. Place onion rings in a single layer in the Air Fryer basket. You can place smaller rings inside bigger rings if necessary, just make sure there is space between them.
- Cook at 400°F until golden brown and crispy, about 11-15 minutes. Spray with some cooking spray after about 6 minutes. You don’t need to turn the onion rings.
- Carefully lift out the onion rings with a cookie spatula or fork and serve.
Notes
- Make sure to use sweet onions for this recipe! White and yellow onions don’t work well with the breading.
- This recipe is messy but well worth the effort.
- If you don’t have panko breadcrumbs you could also use normal breadcrumbs but the result might not be as crispy.
- Divide the panko breadcrumb mixture in two so you can switch to the second batch after the first gets sticky.
- Use a fork and not your hands to coat the onion rings.
- If you don’t have buttermilk, you can easily make your own by adding 1 Tbsp of vinegar or lemon/lime juice to a ½ cup of milk.
- The cook time depends on your Air Fryer model. Keep an eye on them!
- You don’t need to turn the onion rings during the cooking process! Don’t shake the basket or the breading will fall off!
- Be careful when lifting the onion rings out of the basket! I recommend using a cookie spatula or fork to lift them out.
Calories: 193kcal | Carbohydrates: 26g | Protein: 4g | Fat: 8g | Saturated Fat: 1g | Cholesterol: 3mg | Sodium: 1208mg | Potassium: 260mg | Fiber: 2g | Sugar: 9g | Vitamin A: 540IU | Vitamin C: 7.9mg | Calcium: 68mg | Iron: 1.4mg