Chicken thighs have a way of saving dinner. Not in a dramatic sense, but in that quiet, reliable way where you open the fridge, see them sitting there, and just know tonight is going to be fine.
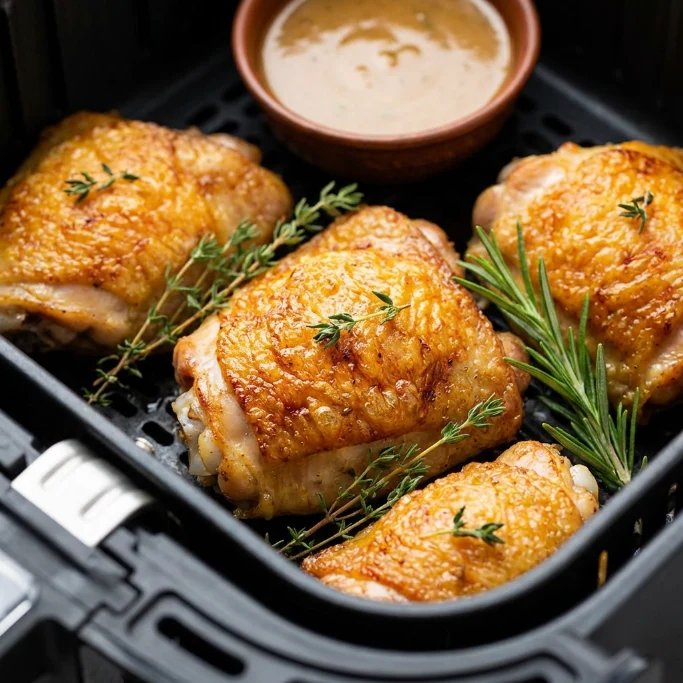
This recipe uses bone-in, skin-on chicken thighs coated in a simple dry rub and cooked in the air fryer until the skin crackles and the inside stays impossibly juicy. It’s the kind of meal you make once and immediately add to the regular rotation.
The Night This Became a Staple
It started on a Tuesday — the kind of Tuesday where the day ran long, the energy ran short, and delivery felt like the only option. But there were four chicken thighs in the fridge, a handful of spices in the cabinet, and the air fryer sitting right there on the counter.
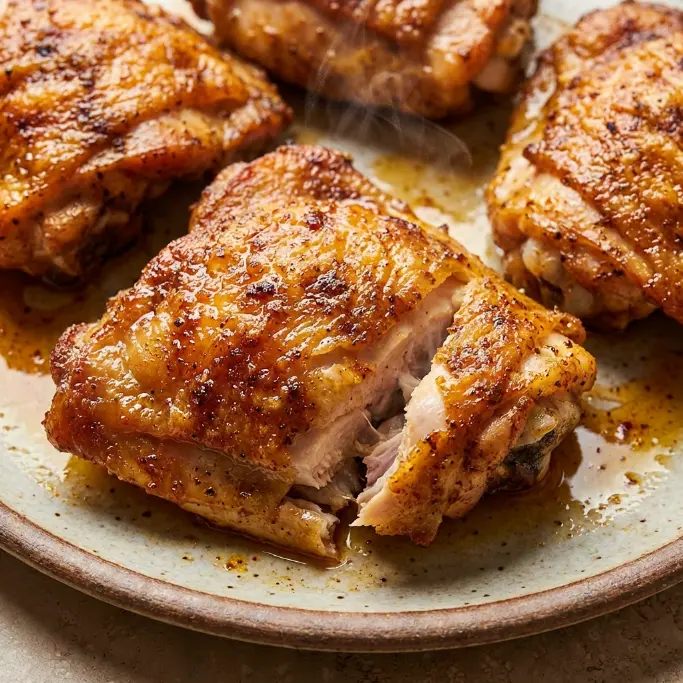
That night was the first time those thighs went into the air fryer instead of the oven. The skin came out with a deep golden color and a crunch that honestly felt a little too good for a random weeknight. The inside was tender and juicy, the way bone-in thighs always are when they’re cooked right. That one Tuesday turned into a standing appointment.
There’s something about chicken thighs specifically that works so well for busy evenings. They’re forgiving. They don’t dry out as quickly as chicken breasts, and the bone keeps the meat moist even if dinner gets delayed by ten minutes. The air fryer just takes everything they’re already good at and turns it up.
Why This Dry Rub Works So Well
The seasoning here is straightforward but thoughtful. Garlic powder brings that savory depth. Paprika adds color and a gentle warmth. Dried thyme gives the whole thing an earthy, herby quality that balances the richness of the chicken skin. A touch of brown sugar rounds everything out without making it sweet — it just softens the edges a little and helps the skin caramelize beautifully under the heat.
When those flavors hit the hot circulating air of the fryer, something good happens. The sugar deepens, the thyme blooms, and the fat in the skin renders out slowly into a crunchy, deeply seasoned crust. It smells the way a really good kitchen is supposed to smell.
The olive oil plays a supporting role here. It helps the rub stick, encourages even browning, and adds just enough richness without weighing anything down. You don’t need much — two tablespoons spread across the thighs does the job well.
What the Air Fryer Actually Changes
Bone-in chicken thighs in the oven are good. Nobody’s arguing that. But they take thirty to thirty-five minutes at 400°F, and the skin, while nice, never quite gets to that satisfying crunch you want.
The air fryer cuts that time significantly and delivers the crispiness that the oven can only approximate. The rapid hot air circulation pulls moisture away from the skin while cooking the meat through from all sides. The result is a chicken thigh that looks and tastes like it took far more effort than it did.
Less oil, less mess, and a shorter window between craving and eating — those are the real reasons this method wins.
Making These at Home
Ingredients
- 2 lbs. bone-in, skin-on chicken thighs (about 4 thighs)
- 1/2 tablespoon garlic powder
- 2 teaspoons paprika
- 1 tablespoon dried thyme
- 1/2 teaspoon salt
- 2 teaspoons brown sugar
- 2 tablespoons olive oil
Instructions
- Preheat your air fryer to 400°F and give the inside of the basket a light coat of non-stick cooking spray.
- Combine the garlic powder, paprika, dried thyme, salt, and brown sugar in a small bowl and stir until evenly mixed.
- Pat the chicken thighs dry with a paper towel — this step matters for getting the skin crispy. Press the dry rub all over each thigh, covering every surface.
- Place the thighs skin-side down in the basket and drizzle them with the olive oil. Depending on your air fryer size, you may need to cook in two batches.
- Air fry for 8 minutes, then flip each thigh and cook for another 8 minutes. The internal temperature should read between 160°F and 165°F. If you want the skin a little crispier, give them another 1 to 2 minutes.
- Let the chicken rest for 3 to 5 minutes before serving.
Tips That Actually Help
Don’t skip the drying step. Patting the chicken dry before adding the rub removes surface moisture that would otherwise steam the skin instead of crisping it. It takes ten seconds and makes a real difference.
Give the thighs space in the basket. Crowding them traps steam and prevents that even browning you’re going for. If your air fryer runs small, cook in two rounds rather than packing them in.
Preheat the air fryer before the chicken goes in. A hot basket means the skin starts crisping the moment it makes contact. Skipping the preheat leads to uneven results — the outside cooks slower, and you lose some of that texture.
Use a meat thermometer if you have one. The goal is 165°F at the thickest part of the thigh, away from the bone. It takes the guesswork out of the whole thing.
Mistakes Worth Knowing About
The most common one is pulling the chicken too early. If the skin looks golden but the thermometer hasn’t reached 165°F, keep it going. The color can be deceiving with thighs because the dark meat naturally looks more done before it actually is.
The second mistake is skipping the rest time. Those 3 to 5 minutes after cooking let the juices redistribute through the meat. Cut in too quickly and you lose them to the plate. Just let it sit — it’s worth the wait.
Ways to Make It Your Own
The dry rub in this recipe is a solid base, but it’s easy to adjust. Smoked paprika instead of regular adds a deeper, almost woodsy note. A pinch of cayenne brings gentle heat without overpowering the other flavors. If you lean toward Italian flavors, swap the thyme for dried oregano or rosemary and add a little lemon zest to the rub before pressing it on.
For a slightly sweeter glaze, brush a light coating of honey over the thighs in the last two minutes of cooking. It caramelizes quickly under the heat and gives the skin an almost lacquered finish.
If you prefer boneless skinless thighs, the recipe works well — just reduce the cooking time to about 12 to 14 minutes depending on thickness, checking the internal temperature toward the end.
Air Fryer Size and Model Notes
Basket-style air fryers tend to work really well for this recipe because the thighs sit close to the heating element and get good direct heat on both sides. Oven-style air fryers work too, but you may need to add 2 to 3 minutes and check early since the heat circulates a little differently.
For smaller 3 to 4 quart models, plan on cooking two thighs at a time to keep spacing proper. Larger 5 to 7 quart models can often handle all four in a single batch.
Serving Ideas
These chicken thighs are genuinely versatile. On a weeknight, they sit well next to roasted potatoes or a simple green salad. On a slower weekend evening, they’re good alongside something like roasted asparagus or sweet potato fries.
They also work well for meal prep. Cook a batch on Sunday and use them throughout the week — sliced over grain bowls, pulled apart for wraps, or simply reheated and eaten as-is with whatever’s in the fridge.
Storing and Reheating
Once the chicken cools down, store it in an airtight container in the refrigerator. It keeps well for 3 to 5 days.
For reheating, the air fryer is the best tool. Set it to 350°F and warm the thighs for 2 to 3 minutes. The skin won’t be quite as dramatically crispy as fresh, but it comes back reasonably close — far better than the microwave, which softens the skin and leaves it a little rubbery. If the microwave is the only option, 60 seconds on high gets the job done in a pinch, just with different texture expectations.
FAQ
Can I use boneless skinless chicken thighs instead of bone-in?
You can, and they’ll still turn out great. The main difference is that boneless thighs cook a little faster, so you’ll want to bring the total time down to somewhere between 12 and 14 minutes depending on how thick they are. Check the internal temperature around the 10-minute mark and adjust from there. The skin-on crunch won’t be there, obviously, but the inside stays moist and the seasoning comes through just as well.
Do I need to preheat the air fryer before cooking?
It’s worth the extra few minutes. A preheated basket means the chicken starts cooking the second it goes in, which helps with even browning and that crispy skin. If you skip it, the results are still edible — just a little less consistent. Most air fryers reach 400°F in about 3 minutes, so it’s not a long wait.
How do I know when the chicken thighs are fully cooked?
The most reliable way is a meat thermometer. Press it into the thickest part of the thigh, staying away from the bone, and look for a reading between 160°F and 165°F. Visual cues can help too — the juices should run clear when you cut in — but the thermometer removes any doubt. Dark meat can look done before it technically is, so that internal check matters.
Can I use a marinade instead of a dry rub?
A marinade works, but it changes the outcome. The extra moisture from a marinade tends to create steam in the air fryer rather than dry heat, which means the skin won’t get as crispy. If you love marinated chicken, pat the thighs as dry as possible before they go in and expect a softer exterior. For maximum crunch, the dry rub is the move.
A Final Thought
There’s something quietly satisfying about a recipe that never lets you down. These chicken thighs are that for a lot of people — not flashy, not complicated, just reliably good every single time the basket comes out. Once you make them, you’ll stop wondering what to do with those thighs in the fridge. You’ll already know.
Crispy Air Fryer Chicken Thighs
Ingredients
Method
- Preheat your air fryer to 400ºF and spray the inside of the basket with non-stick cooking spray.
- Add the garlic powder, paprika, dried thyme, salt, and brown sugar to a bowl and mix until combined.
- Pat the chicken thighs dry with a piece of paper towel and sprinkle the dry rub over the chicken thighs. Be sure the dry rub covers the entire chicken thigh.
- Place the chicken thighs skin-side down into the air fryer and drizzle them with olive oil. You may have to do this in two batches depending on the size of your air fryer.
- Air fry for 8 minutes. Flip, and air fryer for 8 more minutes. If the internal temperature of the chicken is 160ºF – 165ºF and the skin is crispy, remove the chicken thighs from the air fryer. If you would like your chicken thighs crispier, cook them for an additional 1-2 minutes.
- Let the chicken sit for 3-5 minutes and enjoy.
Notes
-
- Instant Pot: sear chicken breast in olive oil for 2 minutes on each side. Remove them and add the trivet. Place the chicken on top and air fry on high pressure for 5 minutes with a quick release. Learn more from our Instant Pot chicken thighs recipe.
-
- Stovetop: sear chicken breast over high heat for 2-3 minutes on each side. Then, turn the heat down to low/medium and cover. Cook for 10-15 minutes.
- Oven: line a baking sheet with tin foil and a metal baking rack. Place the chicken thighs on top and roast at 400ºF for 30-35 minutes. Learn more from our oven chicken thighs recipe.
Calories: 573kcal | Carbohydrates: 4g | Protein: 37g | Fat: 45g | Fiber: 1g | Sugar: 2g