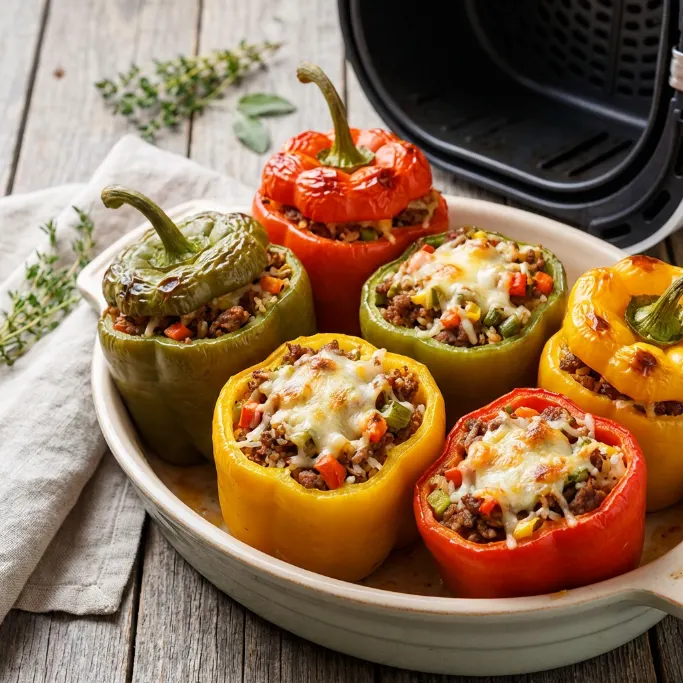
Stuffed bell peppers are one of those meals that looks like it took real effort — and the good news is, in the air fryer, it actually doesn’t. You get a tender pepper, a hearty beef and rice filling seasoned in a rich tomato sauce, and a layer of bubbly mozzarella on top that finishes in minutes.
This is the kind of dinner that earns compliments without requiring any explanation of how little time it actually took.
Why This Recipe Feels Like More Than a Weeknight Meal
There’s something deeply satisfying about a stuffed pepper. The pepper is the vessel and the vegetable at once. The filling is a full meal — protein, starch, sauce — packed into something you can eat without a serving spoon. It’s practical in the best possible way.
Growing up, stuffed peppers were an oven dish. They took the better part of an hour and required enough planning ahead that they were saved for weekends or the occasions where someone had extra energy. The air fryer changed the timeline without changing anything about what makes the dish good.
At 360°F, the peppers soften properly without turning mushy, the filling stays moist inside the pepper wall, and the cheese on top gets that browned, bubbly finish in just two additional minutes. The same recipe that used to take the better part of an evening now fits comfortably into a regular Tuesday.
Building the Filling — What Each Ingredient Does
The filling here is a stovetop job before anything goes into the air fryer, and it’s worth doing it right. Starting with diced onion and the tops of the peppers — which you’d otherwise discard — cooked together in olive oil builds a sweet, savory base that carries through the entire filling.
Lean ground beef goes in next, broken into small pieces and browned until it has color rather than just being cooked through. That browning adds depth that boiling or steaming the meat wouldn’t produce. Minced garlic goes in last in the stovetop phase, cooking just long enough to become fragrant without burning.
The no-salt-added tomato sauce brings everything together with a bright, clean acidity. Italian seasoning — split between the filling and the cheese topping — adds an herby warmth throughout. Paprika gives color and a gentle smokiness. Salt and pepper balance the whole thing. Cooked rice is folded in at the very end, off the heat, so it absorbs the sauce without becoming soft or losing its texture inside the pepper.
Mozzarella is the finishing move. It melts cleanly, browns quickly under the air fryer’s heat, and has a mild creaminess that ties every component of the filling together in the final bite.
Making It at Home
Ingredients
- 4 large bell peppers
- 1 tablespoon olive oil
- 1 small onion, diced
- 1 pound lean ground beef
- 3 garlic cloves, minced
- 1 (15-ounce) can no salt added tomato sauce
- 2 teaspoons Italian seasoning, divided
- 1 teaspoon paprika
- 1 teaspoon salt
- 1/2 teaspoon ground black pepper
- 1 cup cooked rice
- 1 cup shredded mozzarella cheese
Instructions
- Slice the top off each bell pepper and set the tops aside. Remove and discard the seeds from inside each pepper. Dice the pepper tops and keep them separate.
- Heat the olive oil in a large skillet over medium-high heat. Add the diced onion and diced pepper tops and cook for 6 to 7 minutes, stirring occasionally, until softened and starting to brown.
- Add the ground beef and cook, breaking it into small pieces, until fully browned. Add the minced garlic and cook for 1 minute until fragrant.
- Pour in the tomato sauce and add 1 and 1/2 teaspoons of Italian seasoning, the paprika, salt, and black pepper. Bring to a low boil and cook over medium-high heat for about 5 minutes, stirring occasionally, until the sauce has thickened.
- Remove the skillet from heat and fold in the cooked rice until evenly combined.
- Preheat the air fryer to 360°F for 5 minutes.
- Spoon 1 to 1 and 1/4 cups of filling into each pepper, packing it in tightly. Place the stuffed peppers upright in the air fryer basket and cook at 360°F for 10 minutes.
- Open the basket and top each pepper with shredded mozzarella and the remaining 1/2 teaspoon of Italian seasoning. Cook for an additional 2 minutes, until the cheese is melted, lightly browned, and bubbly.
Tips That Make a Real Difference
Pack the filling tightly. When you spoon the filling in loosely, it settles and compacts during cooking and ends up sitting well below the rim of the pepper. Packing it in firmly from the start means the filling stays full through the top, and the cheese layer sits right at the edge where it can melt and brown properly.
Use pre-cooked rice. The rice goes into the filling already cooked and doesn’t cook further once it’s inside the pepper. Leftover rice from the night before actually works perfectly here — it’s drier than freshly made rice and absorbs the tomato sauce more readily without making the filling wet.
Dice the pepper tops instead of discarding them. It’s a small move that adds flavor to the filling and means nothing from the pepper goes to waste. Cooked down with the onion, the diced tops become sweet and almost caramelized, contributing to the filling without being identifiable on their own.
Keep the peppers as upright as possible in the basket. If they tip during cooking, the filling spills before the pepper has had a chance to soften and hold its shape. For baskets where the peppers tend to lean, a small piece of crumpled foil tucked alongside each one can help them stay stable.
Common Mistakes Worth Knowing About
Skipping the browning step on the beef is the mistake that most affects the flavor of the filling. Ground beef that’s cooked just until the pink is gone tastes flat compared to beef that’s allowed to develop actual color in the pan. Let the heat do its work — a properly browned batch of beef adds a depth to the filling that no amount of extra seasoning can replicate.
Using fresh rice straight from the pot is the other common issue. Hot, freshly cooked rice is soft and wet, and when it gets folded into the tomato sauce, it continues absorbing liquid and can make the filling turn mushy inside the pepper. Day-old rice or rice that’s been cooled completely holds its texture through the whole process.
Variations and Substitutions
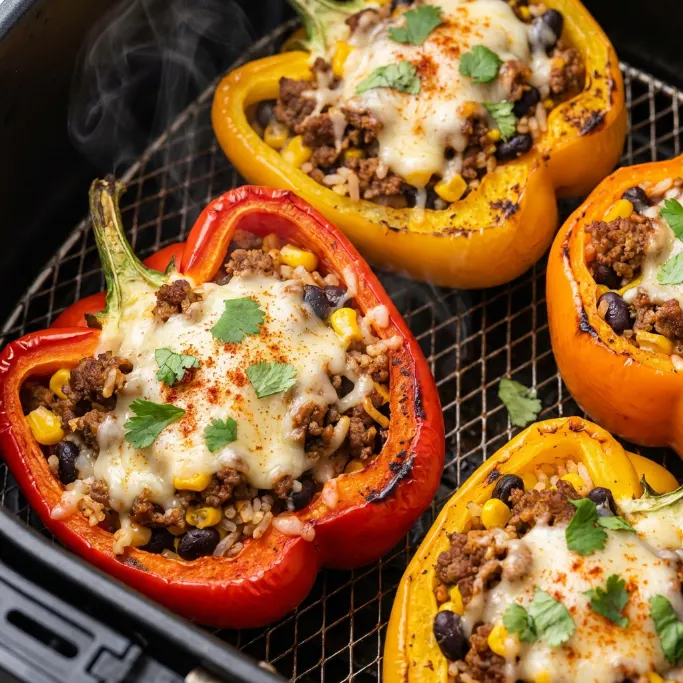
The color of the pepper matters more than you might expect. Red, orange, and yellow bell peppers are sweeter and tend to pair well with the savory richness of the beef filling. Green peppers are more bitter and vegetal, which creates a sharper contrast with the filling — some people prefer it that way, and it’s a perfectly valid choice.
For a spicier version, add a pinch of red pepper flakes to the filling alongside the paprika, or use a spicier jarred tomato sauce as the base. The filling can carry a decent amount of heat without the overall dish feeling overwhelming.
For a lighter variation, substitute ground turkey for the beef. The filling becomes a little less rich but stays well-seasoned and satisfying. The method is identical — brown the turkey as you would the beef and proceed from there.
Cheddar or a Mexican blend can replace the mozzarella if that’s what’s already in the fridge. Mozzarella melts the most cleanly and browns beautifully, but cheddar adds a sharpness that works well with the Italian seasoning in the filling.
Air Fryer Model Notes
Four large stuffed peppers fit comfortably in most standard 5 to 6 quart basket-style air fryers. If your model is smaller, cook two peppers at a time and repeat for the second round. The second batch typically finishes in about 9 minutes since the basket is already at temperature.
For oven-style air fryers, place the peppers in the center of a rack positioned in the middle of the oven and use the air fry function. Add 2 to 3 minutes to the initial cook time and check whether the pepper walls have softened enough before adding the cheese.
How to Serve It
Stuffed bell peppers are a complete meal on their own — protein, vegetables, and starch all in one package. For a larger spread, a simple green salad with a light vinaigrette alongside the peppers is all you need to turn it into a proper dinner that feels composed and intentional.
This recipe serves four, which makes it ideal for a family weeknight dinner. For smaller households, it also works well as a two-night meal — the peppers reheat beautifully and arguably taste even better the next day after the filling has had time to settle and the flavors deepen.
Storing and Reheating
Leftover stuffed peppers store well in an airtight container in the refrigerator for 3 to 4 days. The filling holds its texture and flavor, and the pepper itself doesn’t continue softening significantly once it’s out of the heat.
To reheat, the air fryer at 350°F for about 5 minutes is the best route. It warms the pepper and filling evenly and gives the cheese top a little of its life back — far better than the microwave, which tends to make the pepper wall rubbery and the cheese greasy. If the microwave is the only option, 2 minutes on medium power works reasonably well with significantly lower expectations for the texture of the cheese.
FAQ
Can I prep the filling ahead of time?
Yes, and it’s a practical move for busy evenings. Make the filling up to two days in advance and store it in a sealed container in the refrigerator. On the night you want to eat, all that’s left is stuffing the peppers and running the air fryer. The filling actually gets slightly better after a day as the flavors settle together.
Do I need to pre-cook the peppers before stuffing them?
Not with this method. The 10-minute cook time at 360°F is enough to soften the pepper walls to a tender but not mushy texture — which is exactly what you want. Pre-cooking the peppers before stuffing them can lead to a pepper that’s too soft by the time the filling is warmed through and the cheese has melted.
What if my peppers keep tipping over in the basket?
A small piece of crumpled aluminum foil tucked against the base of each pepper helps hold them upright. Alternatively, trimming a very thin slice off the bottom of each pepper gives them a flat base to stand on — just be careful not to cut through to the inside of the pepper or the filling will fall out during cooking.
Can I make this recipe without rice?
You can, and the filling is still satisfying without it. The texture will be less dense and the filling may be slightly saucier since the rice normally absorbs a good portion of the tomato sauce. To compensate, cook the sauce a little longer in the reduction step until it’s noticeably thicker before removing it from the heat. Some people add a small amount of cauliflower rice or finely chopped mushrooms as a substitute that absorbs liquid in a similar way.
A Closing Note
Stuffed bell peppers are one of the oldest comfort food ideas in the book. Every family has a version, every cook has their preference for the color of the pepper or the type of cheese on top. This recipe doesn’t try to reinvent anything — it just takes a dish that’s always been worth making and removes the part where it takes all evening. The air fryer handles that. You just handle the filling.
Air Fryer Stuffed Pepper
Ingredients
Equipment
Method
- Slice the top of each pepper and dice the tops. Set aside the diced tops. Deseed the remaining whole pepper.
- Heat oil in a large skillet over medium-high heat. Add onions and the diced pepper tops and cook for 6-7 minutes until softened and browned. Add beef and cook until browned, breaking into small pieces. Add garlic and cook for another 1 minute until fragrant. Add tomato sauce, 1½ teaspoons Italian seasoning, paprika, salt and pepper. Bring mixture to a low boil and continue to cook over medium-high heat until the sauce has thickened, about 5 minutes, stirring occasionally. Remove from heat, add the cooked rice, and toss to combine.
- Preheat the air fryer to 360°F for about 5 minutes.
- Spoon 1 to 1 ¼ cups of filling into each pepper, packing them tightly. Place the stuffed peppers into the air fryer basket and cook for 10 minutes.
- Open the air fryer. Top each pepper with shredded cheese and remaining ½ teaspoon Italian seasoning and air fry for an additional 2 minutes until the cheese is melted, browned, and bubbly.
Notes
Serving: 1pepper with 1-1 1/4 cup filling | Calories: 452kcal | Carbohydrates: 34g | Protein: 35g | Fat: 21g | Saturated Fat: 8g | Polyunsaturated Fat: 1g | Monounsaturated Fat: 9g | Trans Fat: 1g | Cholesterol: 92mg | Sodium: 857mg | Potassium: 1315mg | Fiber: 7g | Sugar: 14g | Vitamin A: 6272IU | Vitamin C: 224mg | Calcium: 300mg | Iron: 6mg