Somewhere between wanting a snack and not wanting to feel guilty about eating one, there is a very real gap. Most of the time, the things that satisfy a craving for something crunchy and salty are not exactly doing you any favors. These air fryer zucchini chips live comfortably in that gap. They are crispy, garlicky, genuinely snackable, and made from exactly four ingredients one of which is a vegetable.
No breading. No complicated prep. Just thin slices of zucchini that go into the air fryer and come out as something that feels almost too good to be this simple.
How This Recipe Came to Be a Habit
It usually starts with a zucchini that has been sitting in the produce drawer a day longer than intended. Not bad, just waiting. On a normal night, it might have ended up sautéed or tossed into pasta, perfectly fine but unremarkable. But slice it thin, salt it, toss it in olive oil and garlic powder, and run it through the air fryer, and something entirely different happens.
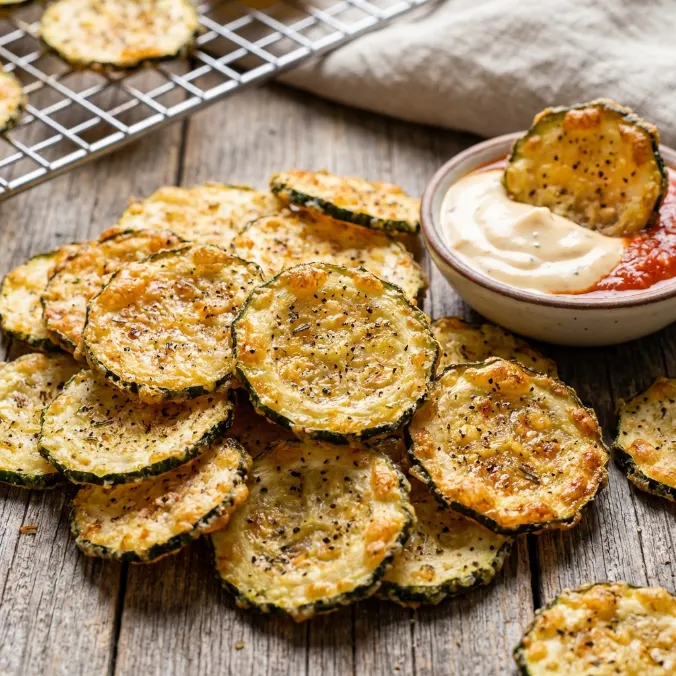
The first time a batch of these came out of the basket, the smell alone was enough — garlic-scented and warm, with that faint caramelized edge that means something went properly brown rather than just cooked. The texture followed through. Crispy around the edges, slightly chewy toward the center of each slice, with just enough salt to make the whole thing feel like a real snack rather than a virtue exercise.
That is the kind of recipe that stops feeling like a decision and starts feeling like a reflex.
The Kind of Snack That Actually Fits
What makes these zucchini chips so practical is how naturally they fit into the rhythm of an ordinary evening. There is no marinating, no breading station, no multiple bowls to wash. You slice the zucchini, salt it briefly, pat it dry, toss it with oil and garlic powder, and let the air fryer handle the rest.
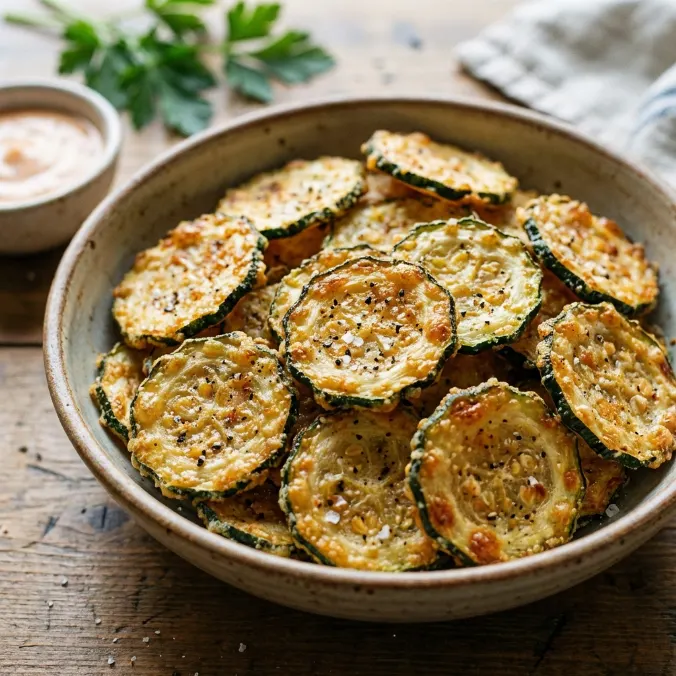
They work as an afternoon snack when something crunchy is all you want. They work as a side dish beside something simple on a weeknight. They work on a weekend when guests are around and you want to put something out that looks more intentional than a bowl of crackers. A plate of these with a good dipping sauce holds its own in any of those situations.
Why This Combination of Ingredients Works
Zucchini has a mild, slightly sweet flavor that does not fight with much. That neutrality is actually one of its strengths — it lets the olive oil and garlic powder come forward without competition. The olive oil coats each slice lightly and gives the surface something to caramelize against in the dry heat of the air fryer. The garlic powder adds savory warmth that comes through in every bite, and the kosher salt does more than just season — it draws moisture out of the zucchini before cooking, which is the step that makes crisping possible.
Without that salt-and-wait step, zucchini would release all that water during cooking instead, and you would end up with limp, slightly wet slices rather than chips. The brief rest on the paper towels is not optional — it is the difference between a chip and a disappointment.
What the Air Fryer Does That Nothing Else Can
Zucchini is a watery vegetable, and cooking it well means managing that moisture carefully. A standard oven can do the job if you have time and a wire rack to encourage airflow underneath each slice. A stovetop pan tends to steam things unless you work in very small batches with a lot of patience. The air fryer, on the other hand, moves hot air continuously around every surface of every slice at once, which pulls moisture away from the zucchini quickly and evenly without needing constant attention.
At 400°F, the heat is high enough to dehydrate the surface and encourage browning at the edges within 15 to 20 minutes. The result is a chip with genuine texture — not just dried-out zucchini, but something with real crunch that holds up when you pick it up.
The Process, Step by Step
Slice one large zucchini into rounds about an eighth of an inch thick. Consistency matters here. If some slices are thicker than others, they will not cook at the same rate, and the thinner ones will be done — or overdone — before the thicker ones have had a chance to crisp up properly. A sharp knife works well. A mandoline gives you the most uniform slices if you have one, but it is not required.
Lay the slices in a single layer on paper towels. Sprinkle kosher salt generously over the top of each one and leave them to rest for 5 to 10 minutes. You will see the surface of each slice become slightly damp as the salt pulls out the moisture. Once the resting time is up, pat every slice dry with a clean paper towel or kitchen cloth — top and bottom. Do not skip this step and do not rush it.
Move the dried slices into a large bowl. Add two tablespoons of extra-virgin olive oil and between half a teaspoon and a full teaspoon of garlic powder depending on how much garlic flavor you want. Toss everything together until each slice is evenly coated.
Arrange the slices in the air fryer in a single layer. If you have a basket-style air fryer, work in batches rather than overlapping. Air fry at 400°F for 15 to 20 minutes total. Check at the 10-minute mark and pull out any slices that are already golden and crispy around the edges — they are done, and leaving them in will take them too far. Continue checking every minute or two and remove chips as they finish, since the remaining slices will cook more quickly once the basket is less crowded.
Set each finished chip on a wire cooling rack rather than a plate. The rack allows air to circulate underneath, which keeps the bottom from going soft while you finish the remaining batches.
Details That Make the Difference
Thin and uniform slicing is the most important single variable in this recipe. Slices that are too thick take much longer to crisp and may end up cooked through but never quite chip-like. Slices that are too thin can go from golden to burned very quickly, especially toward the outer edges of the basket where the heat is most intense.
Do not be tempted to skip the paper towel step to save time. Moisture is the enemy of crispiness, and zucchini holds a remarkable amount of it. The salt does the work of pulling it out, but the patting dry is what actually removes it from the surface. Both steps matter.
Watch the chips individually rather than treating the batch as one unit. They will not all be ready at the same moment — some will crisp up first depending on their size and position in the basket. Pulling them out as they finish is what gets you an evenly crispy final result rather than a mix of perfect chips and over-browned ones.
Making It Your Own
The garlic and olive oil base is a genuinely solid foundation, and it is also easy to take in different directions. Smoked paprika adds a warm, slightly smoky quality that pairs well with the natural sweetness of the zucchini. A pinch of cayenne alongside the garlic powder introduces low, building heat. Onion powder used alongside or in place of garlic powder gives a slightly sweeter, rounder flavor.
For something with a little more richness, a light grating of Parmesan over the slices right before they go into the air fryer adds a nutty, salty crust as the cheese melts and crisps onto the surface. It changes the texture slightly but in a way most people find very welcome.
Lemon zest scattered over the finished chips while they are still hot adds brightness that cuts through the oil and lifts the whole flavor profile. It is a small touch that makes the chips feel more finished.
Dipping Options Worth Trying
These chips are satisfying on their own, but a dipping sauce turns them into something that genuinely competes with any store-bought snack. A simple ranch dressing works well and keeps things familiar. Tzatziki — the cool, garlicky yogurt dip — doubles down on the garlic note already in the chips and is a natural pairing. Marinara sauce gives you something warmer and more substantial if you want the chips to feel more like a starter than a snack.
For something lighter, a squeeze of lemon into plain Greek yogurt with a pinch of salt and some fresh herbs makes a quick dip that comes together in about two minutes and adds a cool, creamy contrast to the crispy chips.
Adjusting for Your Air Fryer
Oven-style air fryers with multiple trays can often fit an entire large zucchini across two trays at once, which means you can do everything in a single pass. Basket-style models will typically need two batches for one zucchini. Either way, the method and timing stay the same.
If your air fryer tends to run hot, check the chips at the 8-minute mark instead of the 10. Chips near the outer edge of the basket or tray will also brown faster than those in the center, so keep an eye on placement when you go to flip or rotate.
Serving These at Their Best
Zucchini chips are at their absolute best within about 10 to 15 minutes of coming out of the air fryer. The cooling rack helps maintain crispiness for a little while longer, but like most things that depend on a dry, crispy surface for their appeal, they are a fresh food. Serve them while they are still warm for the best texture.
If you are making them for a group, time the batches so the last one finishes close to when people are ready to eat. Stack them loosely on a plate or board rather than piling them — pressure flattens the chips and speeds up the softening.
Storing Leftovers
These chips are best eaten the same day they are made. If you have leftovers, store them uncovered at room temperature rather than sealed in an airtight container — trapping them in a closed space traps moisture and accelerates softening. Left out on a wire rack or spread on a plate, they will stay reasonably crispy for a few hours.
Refrigerating them is not recommended. The cold, humid environment of the refrigerator will soften them quickly and they do not reheat well enough to recover their original texture. Make only what you plan to eat, and if you end up with extras, eat them within the same evening.
Frequently Asked Questions
Why do I need to salt the zucchini before cooking it?
Zucchini contains a high amount of water relative to its size, and that water needs to be drawn out before the chips go into the air fryer. The salt pulls moisture to the surface of each slice through osmosis, and patting the slices dry afterward removes that moisture before it can turn into steam during cooking. Skipping this step means the chips spend the first part of cooking time releasing water rather than crisping up, and the texture suffers significantly as a result.
Can I use a mandoline to slice the zucchini?
Yes, and it is a helpful tool if you have one. A mandoline gives you very consistent slices at a uniform thickness, which means every chip cooks at the same rate. A sharp chef’s knife works just as well if you are careful about keeping your slices even. The key in either case is staying as close to an eighth of an inch as possible — thinner and they burn quickly, thicker and they struggle to crisp before the center gets overcooked.
Can I use different seasonings besides garlic powder?
Absolutely. The olive oil, salt, and garlic powder combination is a reliable base, but it is also an open invitation to experiment. Smoked paprika, chili powder, onion powder, Italian seasoning, and cumin all work well here. Just keep the olive oil base the same — it is what gives the seasoning something to adhere to and what enables the surface to brown properly. The spices are fully adjustable.
How do I keep the chips crispy after they come out of the basket?
The most effective method is to cool them on a wire rack rather than a plate. The elevated surface allows air to circulate underneath each chip so the bottom does not trap steam and go soft. Serve them quickly — the longer they sit, the more moisture they absorb from the air and the softer they become. For the best results, eat them within 15 minutes of coming out of the air fryer.
A Snack Worth Making Again
There is a particular kind of quiet satisfaction in turning something as simple as a single zucchini into a bowl of chips that disappears faster than you expected. It does not feel like health food while you are eating it. It feels like a real snack — crunchy, salty, warm, and just garlicky enough to keep reaching back into the bowl.
That might be the best thing about this recipe. It requires almost nothing from you, and it gives back something genuinely good every time.
Air Fryer Zucchini Chips
Ingredients
Method
- Lay zucchini slices in a single layer on a paper towel. Sprinkle salt generously on top of each slice and let sit for 5-10 minutes.
- Pat the zucchini dry with a paper towel or cloth then place zucchini in a large bowl.
- Add olive oil and garlic powder to the bowl. Toss the zucchini until well combined.
- Arrange the zucchini slices in the air fryer either on trays or in the basket in a single layer. (*see note)
- Air fry at 400°F for 15-20 minutes. Check zucchini around the 10 minute mark and remove any chips to a cooling rack that are crispy or starting to turn golden brown around the edges.
- Continue air frying until each zucchini chip is crispy and golden around the edges. Cool chips on a wire rack for a few minutes before serving to help retain crispness.
Notes
Serving: 1SERVING | Calories: 134kcal | Carbohydrates: 3g | Protein: 1g | Fat: 14g | Saturated Fat: 2g | Polyunsaturated Fat: 11g | Sodium: 294mg | Fiber: 1g | Sugar: 1g